Monday, January 31, 2011

good and bad.

I failed.
I was suppose to be a part of The Sketchbook Project and I failed.

I didn't finish.
I didn't send anything in.

It was just too hard. I learned about the project about the time I got engaged so the time I had to spend on it was used for planning my wedding. And I ending up not liking the theme I picked. At all.

I guess theses last 6 months could have been worse. It just sucks losing that money and having nothing to show for it.

Well, now I'm prepared.
I will try again (when I can money-wise).

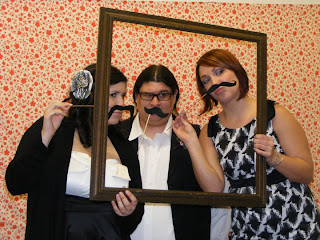
On a completely different note, I got the CD with the photo booth pictures and let me tell you - they turned out great! (Win!) Here are some crowd favorites:


Sunday, January 30, 2011

wolf pack.

One of the things I love most is a good wedding toast. Okay, I just now made that something I love but still...

This speech/toast was given by our friend Sean, you may recognize it. Half the audience was laughing because they knew the reference, some where laughing because its delivery was quite comical, and then there were those poor souls who had no idea what was going on. It was awesome.


"Hello… how bout that ride in? I guess that's why they call it the City of Roses, hahaha. You guys might not know this but I consider myself a bit of a loner. I tend to think of myself as a one man wolf pack. But when I met Spencer, I knew he... was one of my own. And my wolf pack, it grew by one. So there… there was two of us in the wolf pack. I was alone first in the pack and Spencer joined in later. And when Spencer introduced me to you guys I thought "wait a second, could it be?" And now I know for sure, I just added 3 more guys to my wolf pack. Five of us wolves, running around the forest together in Portland, looking for the Avalon and Voodoo. But my wolf pack is not a wolf pack of 5 now anymore. Now Spencer has left my wolf pack, of 5, and started his own wolf pack, of 2… with Heather. And now my wolf pack is missing a wolf. But I'm happy for my wolf pack brother and his wolf pack wife. Here's to Spencer and his new wolf pack of 2."


Thursday, January 27, 2011

d.i.y. boutonnières


As promised, here is a quick tutorial on how I made the boutonnieres for my wedding! This is what they looked like:


Gather all the needed supplies
- glue gun
- thin ribbon ( $0-$2 )
- skewer stick ( $1-$2 for bunch )
- peacock feather - 1 per boutonniere ( >$1 if bought in bulk )
- fake petal (or some other object for the back part) ( $1-$4 )
- florist tape ( $1-$2 )
- spotted feathers (some sort of owl, I believe) - 2 per boutonniere ( $1-$4 )
- a 'bud' (or something to act as a centerpiece, maybe a jewel, etc) ($1-$3 )
- pin backs ( $2 )
+_______________________
Total: Less than $10


This is what I had for the backing and the 'centerpiece'. It's made with some sort of paper (bought from saveoncrafts.com (best place EVER), but here's where you can be creative. (You could also just use another feather with a contrasting color.) I plucked it apart and used one petal for the back part and one bud for the center.


Cut your peacock feather into desired shape. I like mine clean cut. Leave about and 1 1/2 inches of the stem to work with. You may want a few feather to pratice cutting the feathers. Sounds silly, but they can be a bit feisty.


Cut a three inch piece of your skewer stick and hot glue it to the 'back' side of you back piece (mine being the paper petal)


Flip it over and glue the peacock feather to it. Position it to where the 'eye' is centered on the backing.


It's okay if there's some glue residue. It will get covered up!


Position one spotted feather into place and glue it down. It was easiest for me to glue the whole feather and then trim it.


Trim that baby up! I put it more on one side so in the end it would flank the peacock feather.


Do the same with the other feather. Trim it up and admire your "hard" work thus far!


Next, hot glue your centerpiece down! Here I used one of the buds of the paper flower.


Wrap it all up with florist tape starting from the base where the feathers are going down.


Then you are going to do the same thing, but with the ribbon. Hot glue a dot or two at the top to get started and add some dots as you wrap down.


Mine weren't perfect at the ends, but that's what gives them character : )


Viola! You are done!
*** To attach them to shirts I simply attached a pin back to the back of the stem part and it was ready to wear!

(These can be purchased at any craft store)


I added a couple more feathers for the Groom's : )


And that's it! Easy as pie. Or at least cake from a box ; )

Tuesday, January 25, 2011

nuptials.


two thousand and eleven.

Well, somehow it is a new year and therefore I've revamped the blog. Hope you likes ;)

First thing's first.

I.
am.
a.
married.
woman,

as of 1.1.11.

I married my best friend on the horribly cold day in little(ish) Gresham, OR. Still waiting for the legit photos, but for now I'll give you some teasers. (Yeah right, I'll just post some in another post.) That's a lot of post-ing...

Thumbprint guest book, origami peacocks, photo+mustache-on-a-stick= centerpieces!


Ceremony led by the ever-so-lovely Kevin Reed. Apparently we're 'quirky'. Is this a good thing?


Our lovely wedding party.


Best. Toast. Ever. Have you seen The Hangover? Well, it's that plus some personal additions. Purely awesome.


Despite getting a cold sore the week before, starting my period the DAY before, it was a pretty fantastic day. We had planned for 200 and had standing room only. It was crazy. We are so blessed.